Adding Google Analytics to a site (using GTM)
Last Updated / Reviewed: Jan 10th, 2023 Execution Time: ~15-30 minutes
Goal: To add Google Analytics 4 to a site using Google Tag Manager and verify that it is working properly.
Ideal Outcome: Google Analytics 4 is properly added & configured without any technical issues.
Pre-requisites or requirements: You need a Google Analytics 4 account created. Also, you should have installed Google Tag Manager on your site. If you haven’t added Google Tag Manager to your site, you can check out our Google Tag Manager
Installation SOPs for WordPress, and Shopify.
Why this is important: Google Analytics is the most popular tool to measure website
data to gather visitor insights. With it, you will be able to know the amount of traffic you
are getting, and how your visitors are behaving inside your website.
Where this is done: In Google Tag Manager and Google Analytics.
When this is done: Only once—the first time you install Google Analytics.
Who does this: The person responsible for website management, or analytics.
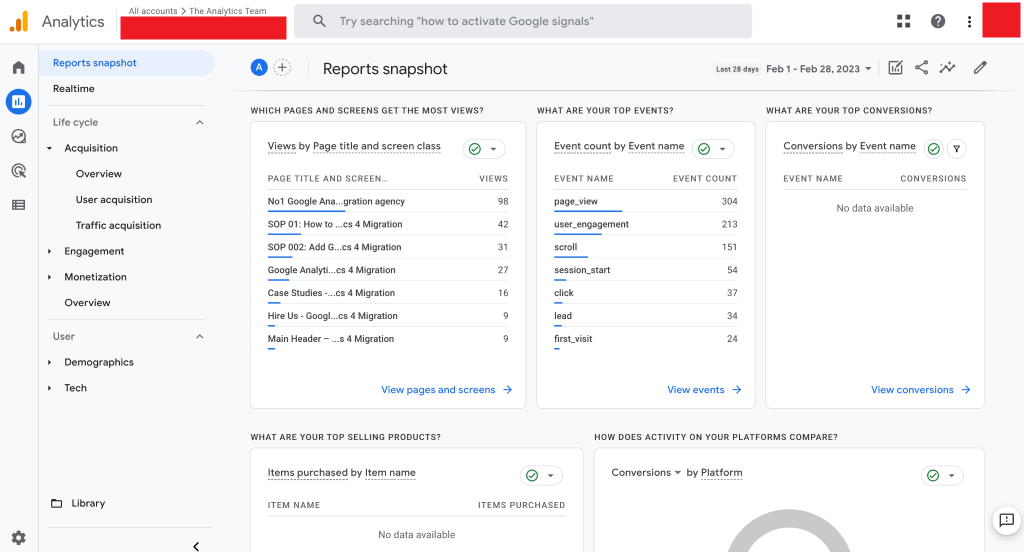

Get the measurement ID from Google Analytics 4
- Login to your Google Analytics account.
- Click “Admin”.
3. Make sure you’ve selected the correct property (website) and select “Data Streams”.


4. Select your website that you want to implement Google Analytics 4
5. Click on the measurement ID to copy it on your clipboard.
6. You can paste it in a text editor or notepad. You will need this later on.


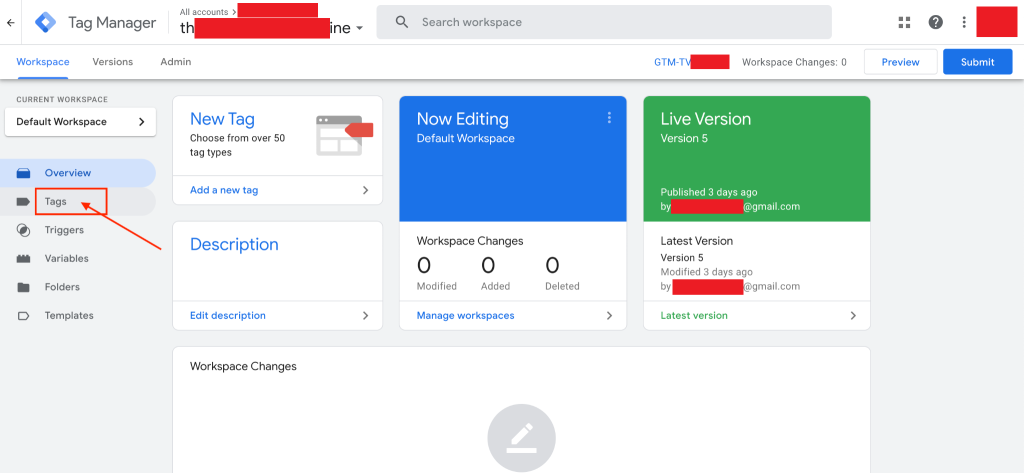
Set up Google Analytics 4 using Google Tag Manager
- Go to http://tagmanager.google.com and sign in with your account details.
- Select the container that is set up on your website.
Go to “Tags”:
Click on “New” and rename your tag. It is recommended that it contains a mention to Google Analytics, it makes it easier in the future to locate the tags you are looking for.
- Note: When creating new tags it’s recommended to define a naming
convention from the beginning, this keeps your Google Tag Manager set up neatly organized and easy to maintain for many years to come.
[Abbreviated Name Of Tool]_[Use for this tag] is a good start.
- e.g: “GA_TrackingCode


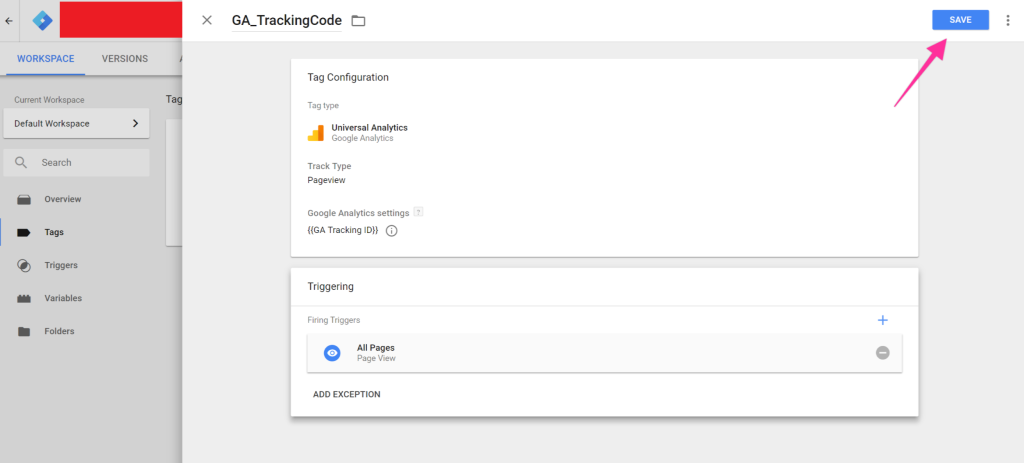
5. Click on the “Tag Configuration”
section →
5. 1 Select “Google Analytics 4 configuration”


6. Paste the Measurement ID that you copied from Google Analytics earlier.
7. Next, click on the Trigger icon to set up a trigger for this tag.


8. Select “All Pages”. This is to fire the Google Analytics 4 on all pages on your website (recommended).
9. You are now ready to save your settings by clicking on “Save”:
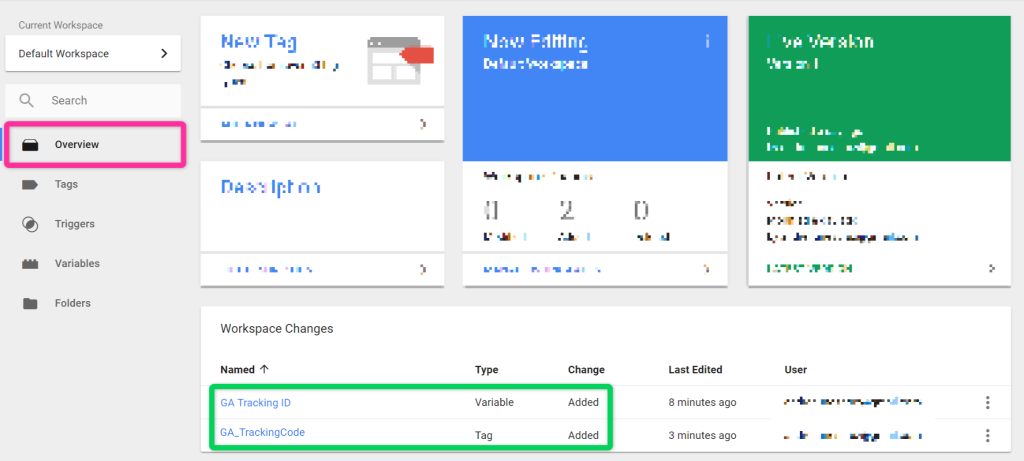
10.If you now click on “Overview” on the sidebar, this is how your Google Tag Manager overview dashboard should look like:
11. If everything looks ok, you are now ready to hit “Submit”

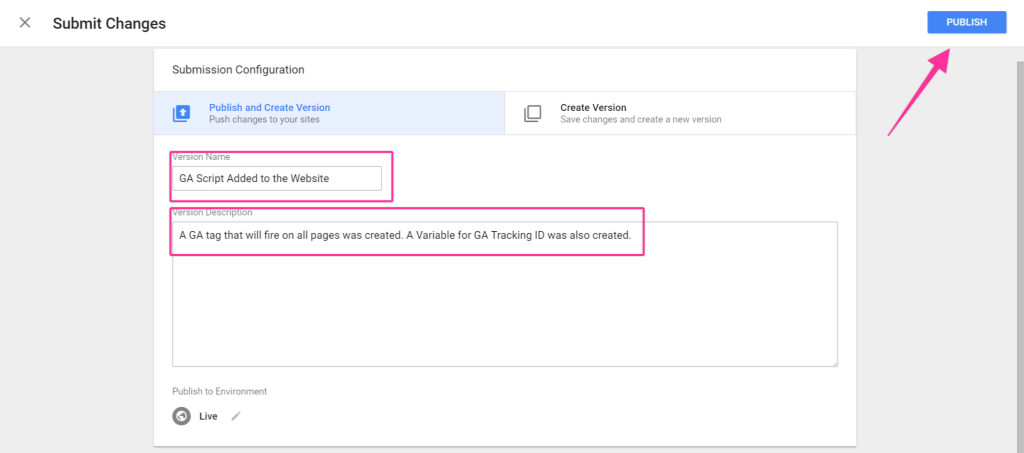
12. In the Submission Configuration panel, you will be given the chance to add a name and description to this version. After you have done so, hit “Publish”.
- Note: Adding a name and description is optional but recommended. You should enter the information here that will make it easy to know what changes are being made.
13. You will now be taken to see the summary of the changes you’ve just made

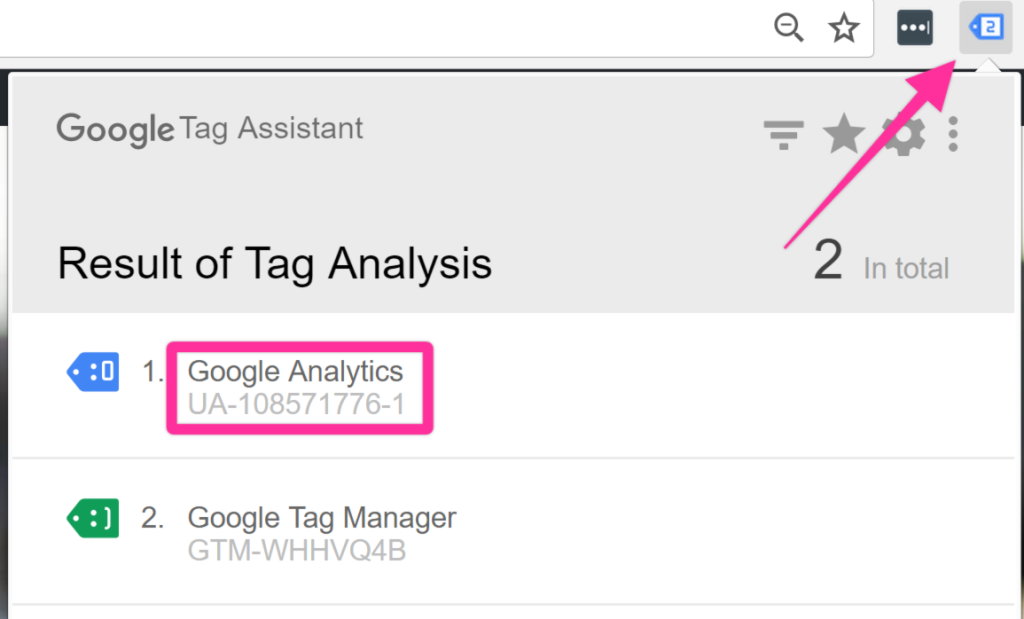
Verify your set up with Google Tag Assistant
Note: This step requires Google Chrome’s Google Tag Assistant extension to be
installed on your browser.
- Go to your website’s homepage
- On your browser click on the Tag Assistant Icon
You should be able to see a Tag named “Google Analytics” and your Analytics Tracking ID beneath it (G-XXXXXXXXX)
be able to see the “Google Analytics” tag inside Google Tag Assistant.
- Repeat this procedure for a few more pages of your website. You should always
Verify your setup inside Google Analytics
- Open Google Analytics by heading over to https://analytics.google.com
- You will be taken to your account dashboard.
- Head to the real-time report under Report ➞ Real-time


- In another Google Chrome tab or window open up your website URL.
- Now go back to the Google Analytics’ tab and wait a few seconds.
- You should see (at least) 1 active user on the website:
